Movavi Step-by-Step Instructions on How to Cut Video, Remove Watermarks, Edit Text and Speed up Video
1. Movavi: Step-by-step instructions on how to cut videos
Step 1: first of all, you need to install the editor and then run the file.
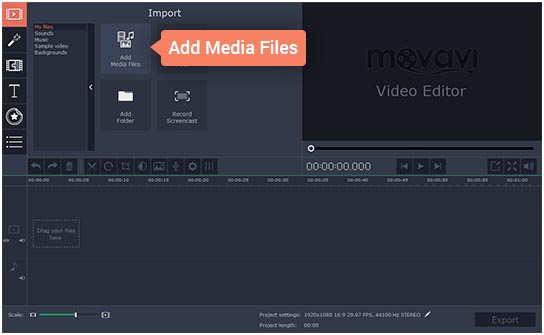
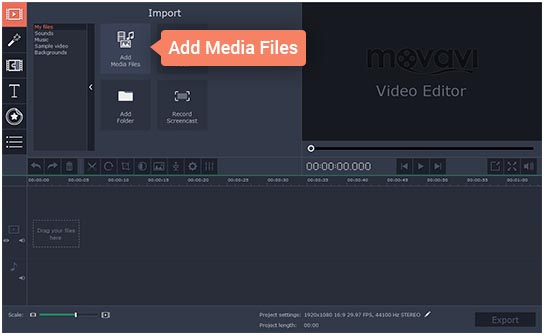
Step 2: When running the program, you need to add the click on “create new project”. When you’ve done this, you need to also click on “Add Media files” button. After clicking on that, a new window pops up, when that happens, you will have to select the video file that you want to trim.
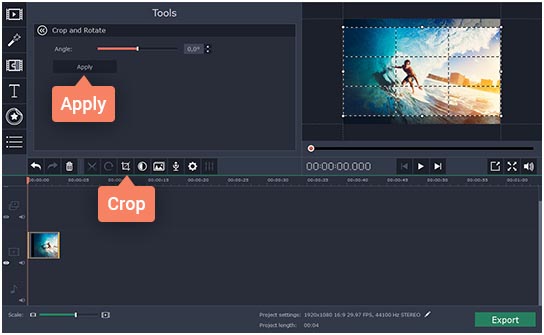
Step 3: To trim the video you will have to click on the video itself and press the “crop” button. After this, you need to expand and move the rectangle in the previous window to decide on a good frame for the video; then click on the ‘’ apply button”
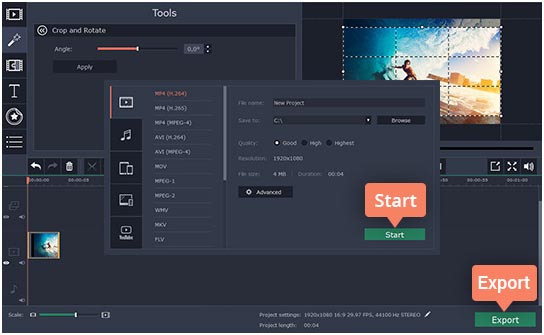
Step 4: You will have to save your movie for it to be viewed on your PC, you can also convert for it to be viewed on YouTube. All you need to do is to click on the ‘’Export” button to perform any these tasks.
2. Movavi: How to Remove Watermarks
It is very easy to remove video watermarks when using Movavi video editor. All you need to do is to purchase the paid version of the video editor. Just as Wondershare, you need to get the project file and reopen. Select register; go to the licensed email with the code given to you to register. However, it is necessary to note that a paid version of this program will definitely remove watermarks from your videos.
3. Movavi: How to edit text
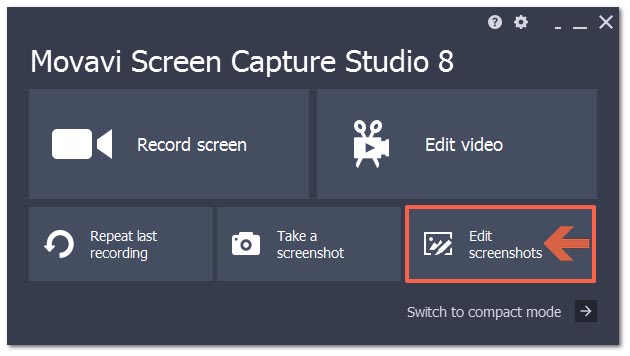
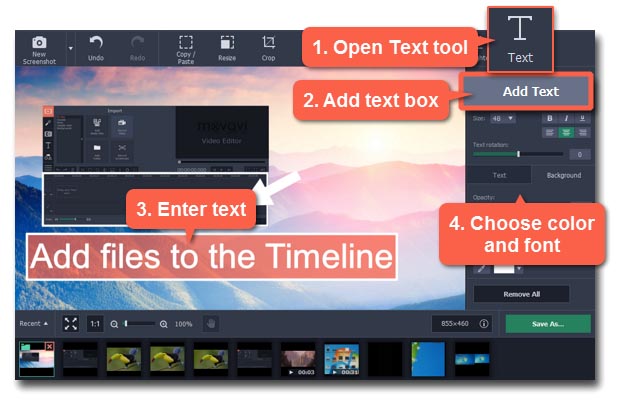
Step1: To edit a text on Movavi all you need to do is to click on “edit screenshots” in the Movavi Screen Capture Studio Launcher to open the screenshot editor window. After this is done, you to click on the screenshot panel, in order to edit the text.
Step2: Also, to add text, on the top of the window, you need to click on the text tool. You can also press the “add text’’ on the right for you to open a text box on the image. Click on the text box twice and enter your text.
4. Movavi: How to Speed up Video
For you to speed up a video file when using Movavi video editor, firstly, you need to add up the file into the program
Step 1: Start the app and click on the “create project in full feature mode”. When you have done this is, you need to click on the “Add Media Files’’
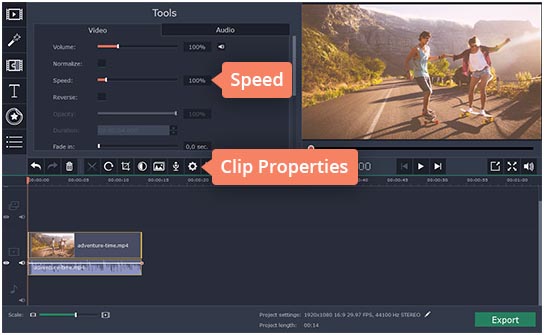
Step 2: To speed up your video playback, all you need to press the “Clip Properties” button and drag the Speed slider to the right
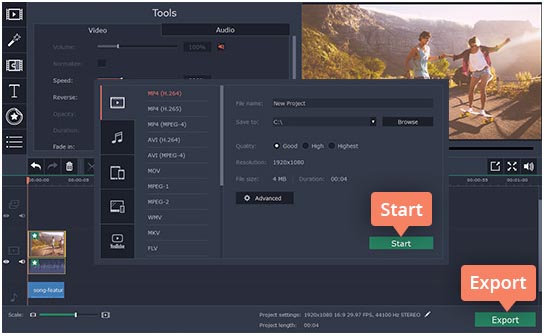
Step 3: it is time for you to export the finished video. To do this, all you need to do is to save the final video into any video format of your choice. When you have chosen the type of format that is suitable, then you need to click on the “export” button and then, you click on the “start” button. This will help save what you have done.
# We recommend you to check Movavi Discount Coupons and Promo Codes before you make any purchase to save upto 50% of the regular price.

